 Testing With Frank
View Selectors
Introduction
A key part of automating a UI is specifying specific UI elements. Once you’ve specified specific elements you can simulate actions against (e.g. tapping or swiping) or you can inspect the state of them (e.g. checking the value of a label or whether button is enabled).
In web application automation you would usually use CSS or XPath selectors to select parts of your UI. With Frank you have a similar choice of selector engines. The default is an engine called Shelley, which implements a syntax inherited from UISpec. (You can also install and use other selector syntaxes, such as Igor.)
We’ll describe the selector syntax that Shelley supports by providing examples of selectors and what they select. We’ll be selecting views from an open-source application called Cheddar.
This article uses screenshots taken from Symbiote to show what views are selected by each example selector. The best way to learn how selectors work is to experiment with them interactively using Symbiote. You can enter a view selector and have Symbiote highlight all the views it would select.
Basic syntax
a view selector consists of a sequence of selection fragments, seperated by spaces. Strings can be wrapped in single or double quotes. For example all of the follwing are valid selectors:
viewview marked:'Foo'view marked:'Foo Bar Baz'label marked:"I'm a label"view:'CustomViewClass' tableViewCell view marked:'blah'
Examples
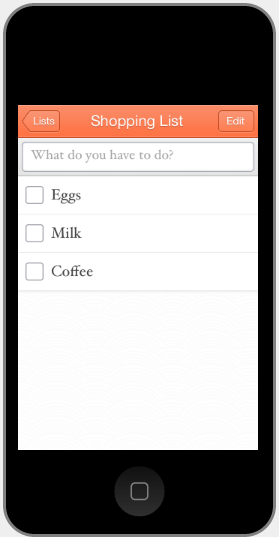
Nothing selected
First of all, for reference here’s a view of our example UI without anything selected
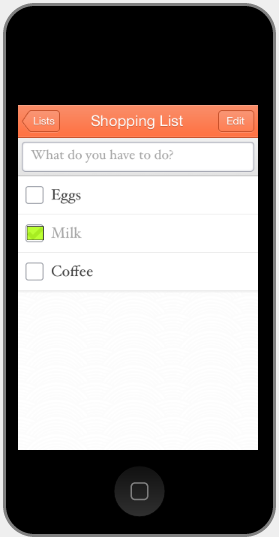
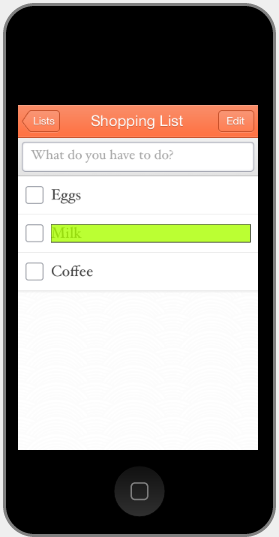
Selecting a view based on its accessibility label
view marked:'Milk'
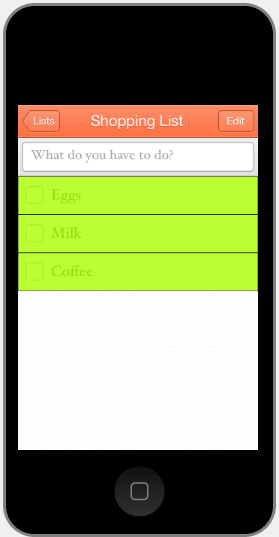
Selecting a view based on its class
view:'UITableViewCell' selects all views of class UITableViewCell.
You can also use a shorthand for commonly used classes:
tableViewCell is exactly the same as writing view:'UITableViewCell'
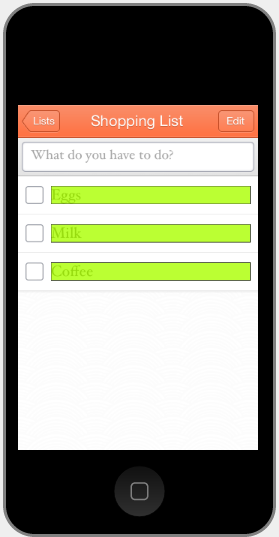
Selecting subviews
tableViewCell label selects all UILabels within UITableViewCells
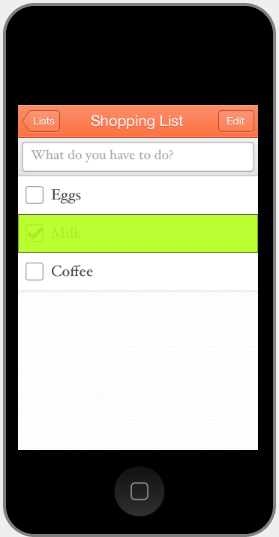
Selecting subviews based on class and accessibility label
tableViewCell label marked:'Milk' selects all UILabels with an accessibility label of ‘Milk’ within a UITableViewCell

Pivoting to select a parent of a view
tableViewCell label marked:'Milk' parent tableViewCell
Here we drill all the way down to select the ‘Milk’ label, then turn around and select the first parent view of that label which is a UITableViewCell.
selecting cousins of a view
tableViewCell label marked:'Milk' parent tableViewCell view:'UIImageView' marked:'small-check'
This can be very useful when you need to select a view to interact with based on a nearby label. In this example you might want to check the box for the ‘Milk’ row.